Thursday, March 26, 2015

"Fast Track Words"

Many of my Reading Intervention students over the years have been boys, and a large number of them have been very keen on riding BMX or Motocross (‘dirt’) bikes.
As many of them have difficulty remembering words that they have not seen often or frequently, they can become discouraged and unmotivated (usually they would rather be outside riding their bike than practising their reading skills anyhow).
I had to come up with an idea to motivate them to practise Sight Words, to give them experience of success and build their confidence in a way they could relate to and without taking too much of their valuable relaxation time after school.
Fast Track Words was the solution I found; you are welcome to use this if you have a child who may relate to the idea*.
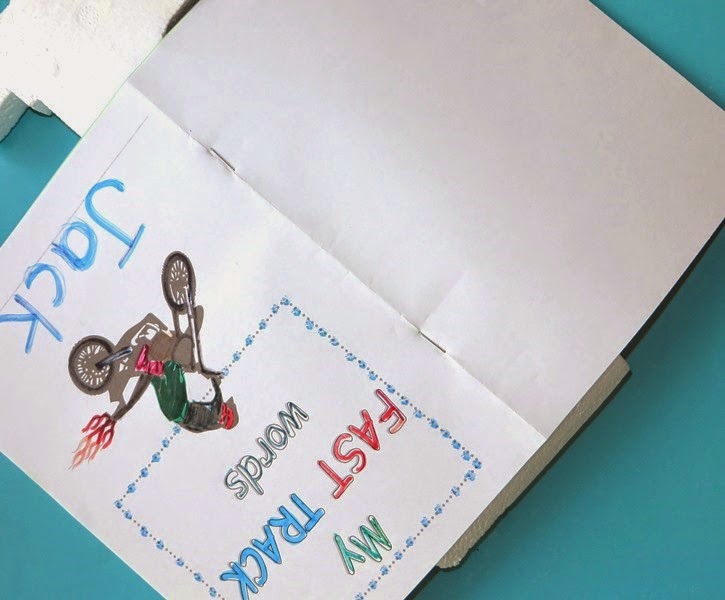

You just need to copy off some “Fast Track Words” lists (one- or two-sided ) and to make a booklet of 4-5 A4 pages (copy the cover onto one page and fold them all in half to make the book). If you have different coloured paper for the pages, this can make it more attractive. The child’s name is written on the front, and he can decorate the cover if he likes.
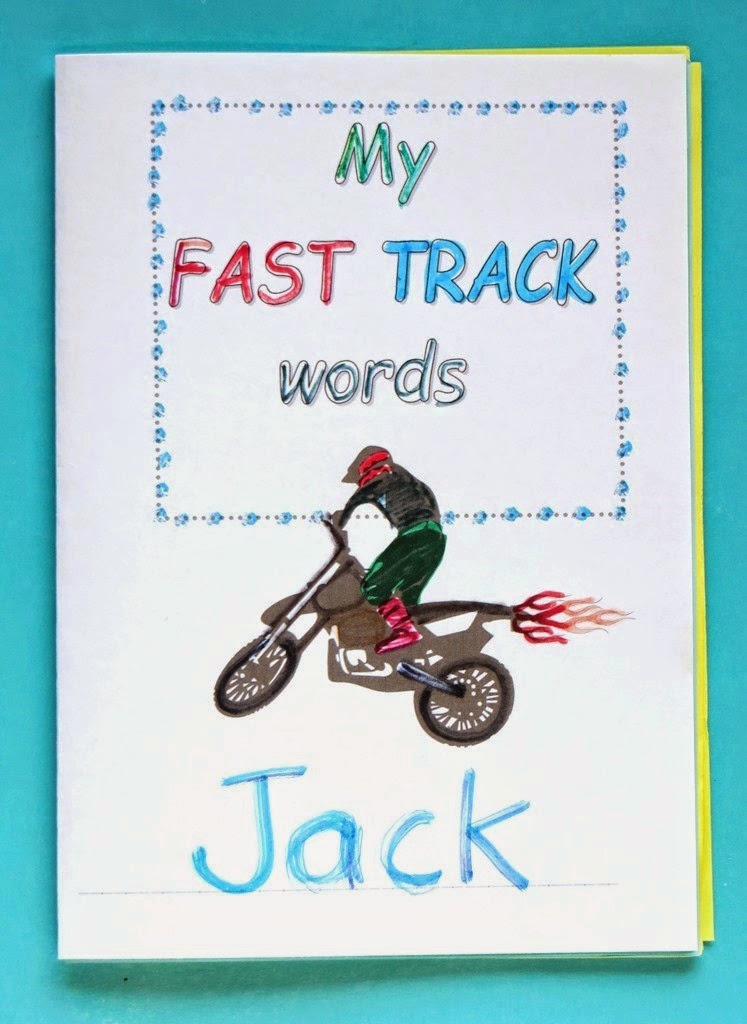
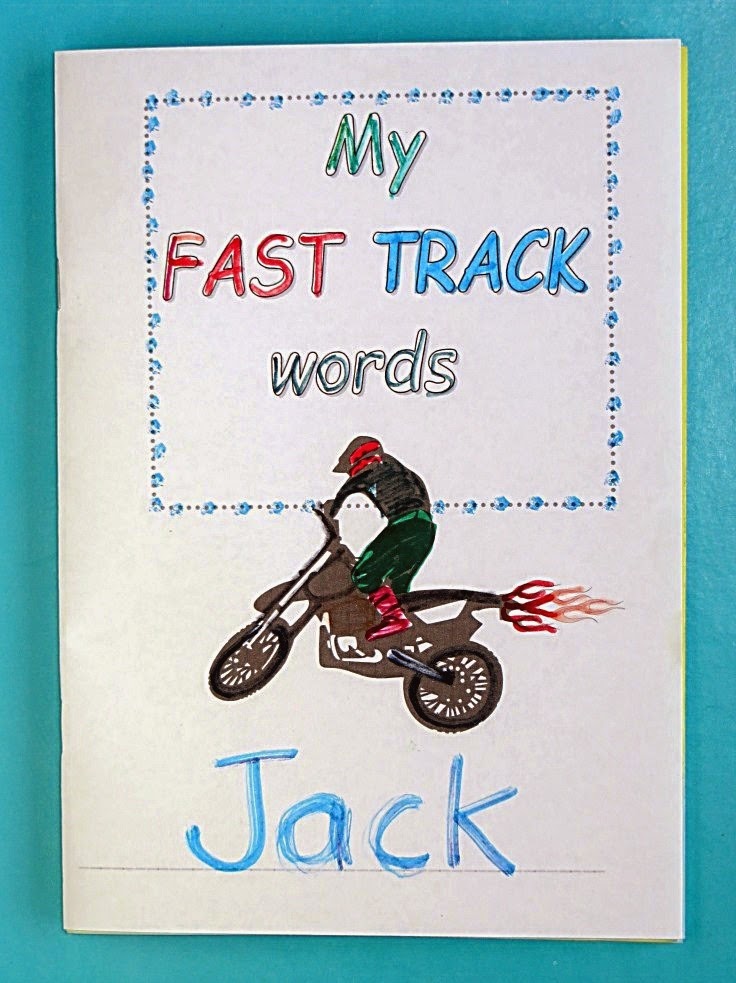
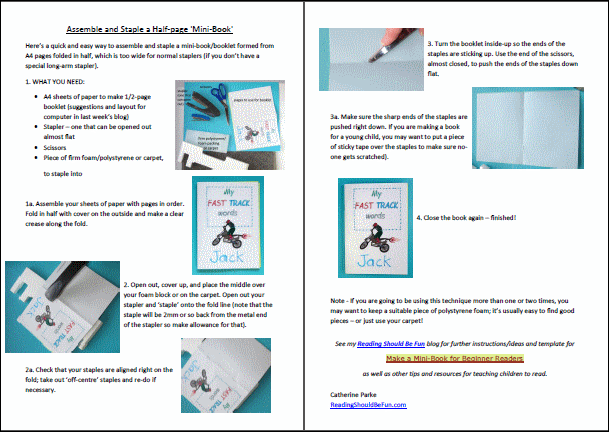
Here is a cover you can print (instructions for stapling the booklet are in the blog post before this one)

Fast Track Words booklet cover to print
About Fast Track Words.
The idea of “fast track” words is to build up a bank of words that are quick to recognise – Sight Words.
When a person reads a word for the first time, it takes longer to process the word, i.e. to “track” through the brain.
Each successive practice of the word, if frequent enough, will form stronger neural pathways so that recognition of the word becomes faster and more automatic.
The analogy for the child is the idea of riding their bike through a paddock or field: the first few times are slow as there are stones, long grass, sticks etc. in the way. Each time they ride along the same way, they wear a track through the paddock, becoming smoother and better formed, so it becomes easier and faster. When we begin to learn a word, it takes a while to get through our brain, to be recognised, and to get out again; each time we practise, it wears a track through our brain and becomes faster and easier, just like a bike track!
When children build up a large enough bank of Sight Words, their reading becomes faster, easier and more fluent, so it should be more enjoyable.
“Fast Track Words’ encourages children to build up their Sight Word vocabulary and to gain recognition for words they already know.
Beginner readers may start with basic words such as their name, Mum, Dad, cat, zoo etc., and gradually build up the collection of words they know well and can read confidently.
The idea is to consolidate words they already know or almost know, not to introduce words that are too challenging (those will need pre-practice).
The chosen words are written on the Fast Track list (you can start with 6-12 ‘easy’ words on a one-sided list so the child doesn’t feel overwhelmed).
Fast Track Words list to print
The child reads the words each day, and each word read correctly and quickly receives a tick (check). 
When a word has 5 ticks, it can be written in to the Fast Track book. Use coloured pens or pencils to make the word more memorable.
The child can illustrate the words in the book or you can add stickers or stamps or decorate the pages if you like (though most of my students are not interested in embellishments – they just like the list of words to grow!).
The book can be looked through from time to time, to revise the ‘known’ words (as these children may often forget words they don’t see frequently); this also reinforces the progress of their learning with tangible evidence.


 When a book is full, it’s easy to start a new one. Keep the old ones to later remind them of how far they have progressed!

*These printables are free for your personal/educational use.

Next Week: printable Easter Sight Words board game.

Wednesday, March 18, 2015

Assembling and Stapling a Half-Page ‘Mini-Book’.

On March 3rd, I posted about how to   
and this week I'm posting 
Instructions for Stapling your Mini-Book.

You don't need a long-arm stapler, even if you are using A4 paper folded in half - here's how to staple the booklet through the middle with just a normal stapler.

WHAT YOU NEED:  
  • A4 sheets of paper to make 1/2-page booklet (suggestions and layout for computer in March 3 blog post)
  • Stapler – one that can be opened out almost flat
  • scissors
  • Piece of firm foam/polystyrene or carpet, to staple into

METHOD:

1.Assemble your sheets of paper with pages in order. 
Fold in half with cover on the outside and make a clear crease along the fold.


2. Open out, cover up, and place the middle over your foam block or on the carpet. Open out your stapler and ‘staple’ onto the fold line (note that the staple will be 2mm or so back from the metal end of the stapler so make allowance for that). 

2a. Check that your staples are aligned right on the fold; take out ‘off-centre’ staples and re-do if necessary.


3. Turn the booklet inside-up so the ends of the staples are sticking up. Use the end of the scissors, almost closed, to push the ends of the staples down flat. 


3a. Make sure the sharp ends of the staples are pushed right down. If you are making a book for a young child, you may want to put a piece of sticky tape over the staples to make sure no-one gets scratched).


4. Close the book again – finished!


I’ll post the information and PDFs for this Fast Track Sight Words book and list next week.

Note- If you are going to be using this technique more than one or two times, you may want to keep a suitable piece of polystyrene foam. I used an odd-shaped piece of packing, which I had to cut with a sharp serrated knife, and it made a mess (I should have had the vacuum cleaner handy). I could have sealed the cut edges with PVA glue if I wanted to keep it, but it’s usually easy to find better pieces – or just use your carpet!


Instructions to Download:

If you would like to download a 2-page PDF Instruction sheet on Assembling and Stapling a Half-Page ‘Mini-Book’, click on the picture below:


Wednesday, March 11, 2015

March game - Shenanigans

I was going to post about assembling and stapling a half-page book this week, but realised that St Patrick's Day is fast approaching, so I'll do the booklet next week and post a game this week.

Shenanigans is a printable board game (free to download this month) for 2-5 players, designed to get children practising their Sight Words.


Click on the picture to open the printable .PDF file

I have made some new 'movers' that you can print and assemble - these are only available here (see below).

For this game, you will need:
  • game board (see above) printed on A4 size light card or paper (laminate for best results)
  • 'sight words' cards (12-20 words that the child/ren need to practise)
  • a die (dice) or spinner
  • 'movers'or tokens - you can use coloured buttons, counters, tiny toys etc. - or print the movers to go with the game (see below - instructions are included)


Click on the picture to open the printable .PDF file  - available for free download this month.

Please remember that all resources on this blog are provided for your personal, educational use only.

Tuesday, March 3, 2015

Make a Mini-Book for Beginner Readers

Often the easiest text for a beginner reader is something that relates to them, using the kind of language they are very familiar with.

It’s very easy to make their own ‘mini-book’ that they can read and re-read proudly.


All you need is a few sheets of A4 paper. Often off-white or coloured paper is better to use for the pages, as it’s not as glary as pure white; some children can find high-contrast text quite difficult to read.

You can write the text on a computer if you like -you can download  is a blank Word docx with suitable layout by clicking on the picture below- and you can use clipart or digital photographs, or you or your child can illustrate the book.


The easiest way to make the book can be to write the words in ink or dark pencil and you or your child draw simple pictures.
(Note- if illustrating by hand, use pencils, crayons, gel pens etc. or lighter felt pens - don’t use felt pens with strong ink that will bleed through).

The text can be as simple as “My Mum….My Dad…” etc., or you can make up a simple story – or let your child dictate the text; this is an excellent way to encourage the development of their expressive language. You can also use the book for older children as a diary, storybook, information/project booklet or to reinforce Sight Words.


If you are writing a book for a beginner reader, make sure there is not too much text on each page and that the writing is clear and not too small. If you are using a computer, Comic sans font (at least size 20) is a good, clear font. It’s quite dark, so you may want to make the text dark grey rather than black. 

Whether hand writing or typing, it can also be a good idea to leave extra space between each word for young children.

Next fortnight - Instructions for assembling and stapling your ‘Mini-Book’.