Thursday, May 28, 2015

Repairing Pre-loved books

Whether you get books for your children from second-hand shops, op shops/thrift shops, yard sales/garage sales or as hand-me-downs, it’s worth repairing them to make reading them as pleasant as possible.

This not only encourages your child to read and enjoy the books, but also indirectly teaches him that books have value (…and also makes them last longer).
If you have old valuable collectable books, it’s better to leave repairs to the experts, but the average well-read children’s book can benefit from a bit of TLC.

Book repair kit-


My essentials to keep on hand for book repairs are:
  • a clean, good-quality eraser for pencil marks (and maybe an ink eraser for biro marks)


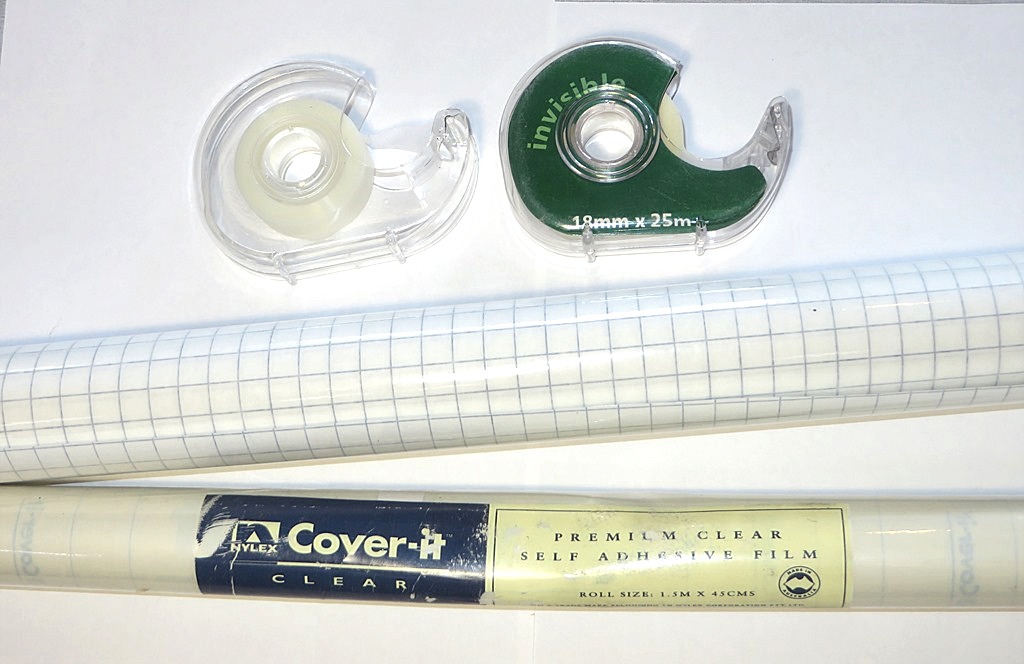
  • invisible tape for repairing tears in pages, bad creases and loose pages,
  • clear contact plastic/ adhesive book covering plastic for repairing covers (or for covering special books)


  • clear craft glue (the kind that comes with a nozzle and dries fast), for repairing spines or worn/separating cover corners, and toothpicks for applying (you could use white PVA glue, but it dries very slowly and is inclined to run, so is much harder to use for page repairs; it’s really only OK for repairing covers).


  • bleach solution (about 1:1 bleach/water), Q-tips/cotton buds & paper towel or tissues for light marks and water-based pen


  • correction fluid or tape (‘White-Out’) for covering indelible marker or biro that won’t rub out


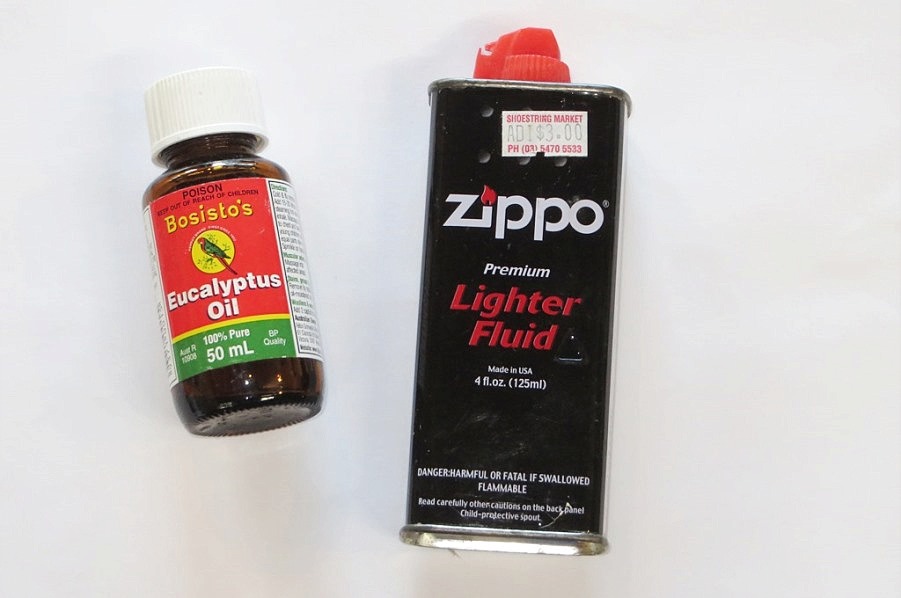
  • eucalyptus oil for cleaning sticky marks (e.g. from price stickers, sticky fingers) off book covers and generally brightening up the cover (if you can’t get eucalyptus oil, you can try lighter fluid or spray cleaner but apply carefully on a cloth or paper towel and be very careful that you don’t rub off the printing or colour on the cover. If you like, you can buff up the cleaned cover with spray furniture polish for a nice-to-handle finish.


You’ll also need sharp scissors for cutting tape/contact plastic neatly, and if the spine is beyond repair you may need duct tape as a last resort – repair first as much as you can with the craft glue, then put duct tape over the spine; you can re-write the book title on with a Sharpie marker).

TIPS:

I don’t recommend using normal shiny sticky tape, as it perishes and yellows after a few years; I’ve found that the more opaque ‘invisible’ tape blends in better to the pages and lasts much better. For repairing shiny covers, you can cut clear contact plastic/ adhesive book covering plastic into strips if the invisible tape is too matte. I always keep off-cuts when covering books, to use for repairs when needed.

I put my bleach solution into an old eye-dropper bottle – very clearly labelled – but you can mix up a little in a throw-away bottle top and use a Q-tip/cotton bud to apply. Apply carefully to marks so that you don’t wet the page too much, and blot off quickly.

Caution: Make sure you keep your repair kit in a safe place, well out of reach of children, as the craft glue, bleach and eucalyptus oil/lighter fluid are all toxic (not to mention not wanting to get sharp scissors or liquid paper into little hands…)!

Wednesday, May 20, 2015

Reading Stories to Children

I have never met a child who doesn't love having stories read to them - even older children who are independent readers will enjoy being read to.


You can so easily find wonderful books at your local library, or your child may be able to borrow them from school or pre-school.

To build up a collection of favourites and your own home library, visit charity shops, car boot sales or yard sales to pick up good pre-loved books cheaply. Libraries may also sell off books (often high-quality hard-cover picture books) that are well-used and just need some TLC and repair with invisible tape and/or craft glue.

Old but still good....

Free 'online' books are readily available for you to read to or with your child. There are links to sites with picture books or story books for children on my ePuzzlEd website (ePuzzlEd  Stories for Children), and in my Pinterest board:


You don't even need to have a book; re-telling old favourites can be wonderful fun, with exaggerated expression and even some actions! You can make up your own stories or tell stories about your childhood. Start simple, ham it up and have fun - you will find you'll get better with practice and your child will tell you if you get anything wrong! If you like, you can use some props (hats, glasses etc., puppets, feltboard) to help tell the story. This Pinterest board may give you some ideas:

 Puppets and People - Pinterest board

The very best way to listen to a story is to have someone read or tell it personally, but you can also find audio books online that your child can listen to when you are busy, on long car trips etc. (see ePuzzlEd  Stories for Children page as above for some links to free audio books and stories to download).

Remember that stories are  not just a fun activity for children; they are a wonderful way to develop a child's sense of our language- the rhythms, speed and pitch variations, articulation, grammatical structure etc. that are all essential for developing good reading skills - so dig out those stories, get reading with your child and have fun!


Wednesday, May 13, 2015

Learning Letter Patterns: using Key Words

Here's a method I used with my Grade 2-4 struggling readers; they were having trouble learning letter patterns such as oa, ai, oy, oi, ou, ow etc., so I developed a sheet for them to use to learn the patterns that were tricky for them. You could also use it for children who are having trouble with some alphabet letter sounds.

This method works because you are concentrating on the individual child - working on the letters or patterns that are difficult for the child, and using words that are significant for the child.
You can download the Key Words sheet to print here:


How to use the Key Words method:

Choose up to 5 'challenging' letters or letter patterns for each child to work on.
Have the child write each of these on a separate sheet of paper, then think of several words using that letter/pattern and write them down, too.

Then on the Key Words sheet, the child writes the letters/patterns neatly in the left column (or you can write them in if the child can't write neatly). 

The child then chooses a 'key word' using that pattern -  a word that is easiest for him to recognise and remember, and writes it neatly in the key space. Note that different children could have different key words, as they are choosing the word that is most significant for themselves. 

The child can then draw a picture in the third column to represent each Key Word - once again, this is an individual focus so it doesn't have to be a work of art, just something meaningful to the child himself.

The child can then practise the letters/patterns on the Key Words sheet each day until he is able to recognise them in words he reads in other contexts. 

You can also make flash cards with the extra words found in the first step, and use those to help the practice (play reading games - see other blog posts for printable board games- using the words to add fun to the practice). Keep the Key Words list handy to assist the child when reading or playing reading games.

Wednesday, May 6, 2015

Spelling - 'Hangman' with a positive twist...

One of the teachers at our school mentioned the idea of a 'Hangman' game ('Happy Man') with a positive slant, using a smiley face. I wasn't sure how it would work, but experimented with various forms. The end result was 
'Smiley Man':


You can use just a pencil and paper, as for hangman, or you can print and copy the sheets above (there are 2 game sheets to a page). Use coloured or off-white paper if possible for children with glare sensitivity. 

The idea of the game, as for Hangman, is to for Player A to think of a word and for Player B to guess the word, by suggesting letters of the alphabet. The aim of Smiley Man is to guess the word and to complete the smiley face.

In Smiley Man, the word is restricted to 5 letters, and there are 16 boxes to write in 'wrong' letters. If Player B suggests a correct letter, it is written in to the word spaces, and one part of Smiley Man's face is drawn in. If the letter suggested is 'wrong' (not in the word), it is written in to the spaces below. 

There are 16 spaces for 'wrong' letters so Player B had a maximum of 16 guesses before he runs out of turns and the game is finished, even if the face is not completed. You may like to let the players finish off/colour in their Smiley Man faces later on (they can add hair etc. too if they wish). 

This game could also be played by teams of 2-4 children.

You can print off the full instructions here...


.... and here is a list of common 5-letter words to help with ideas for the game!